Whilst idly browsing and glancing at this image I was struck by the similarity between the class 23 and class 37 outline and I wondered if English Electric had used the same cab structure design for the class 23 as they did for the 37s and 40s.
Comparison of the drawings in “British Rail Main Line Diesel Locomotives” by Colin Marsden indicated that yes, they probably did.

At this point I remembered that I'd bought the L&J Models 3mm scale class 40 body kit years ago but had never built it because
it has issues, and that it was now lying abandoned in a drawer somewhere.
I went to find it, wondering if a class 40 body can
be cut and shut to make a Baby Deltic?

So, that old L&J Models body, why chop it up? Well, it was a brave effort in 3mm scale, but it has just a few too many serious issues with it, the coarseness of the detail on the cast-whitemetal bogie sideframes for example.
Happily I have no compunctions about savaging it with junior hacksaw, razor saw and engineering file.
Referring to the drawings the body needs to be brought into the right dimensions, firstly being shortened by being cut into three sections, the two outer pieces then being rejoined and the centre section discarded.
 The noses are a little more complicated; the entire nose ends are both cut off from just in front of the cab window pillars. This section is then also reduced in length, split down the middle and the two outer pieces moved outwards and re-attached.
The large gaps resulting from all this surgery are then filled with putty, filed and sanded. The original detail is filed off and gaps are filled to give a flat, smooth surface for adding detail to.
And now, as always when modelling any Modern Image project in 3mm/TT, there’s the issue of motorisation.
The first consideration is that the space inside the body is a little bit limited; I’d been looking at motorising the original 40 body kit using converted Tri-Ang motor bogies, but the inside roof section is a solid flat rectangular slab of resin and internal height is lost, fouling the tops of the motor bogies.
For this incarnation however I need standard 8’6” wheelbase Bo-Bo bogies, so the PIKO Taurus loco chassis fits the bill nicely.
 Piko is a former East-German company that’s made good post-reuinification. Previously Piko only produced
H0 and N scale, but since privatisation they have started to
enter into the Continental-outline TT market at scale 1:120 with RTR products
light-years ahead of the old BTTB models.
Piko is a former East-German company that’s made good post-reuinification. Previously Piko only produced
H0 and N scale, but since privatisation they have started to
enter into the Continental-outline TT market at scale 1:120 with RTR products
light-years ahead of the old BTTB models.
Yes, it is a shame to have to slaughter such a magnificent creature, but it's not her body that I'm interested in...
 The two things that need to be addressed are that the bogie centre-to-centre dimension is wrong as the bogies need to be sitting further apart within the frame, and they will also need new sideframes.
The chassis frame itself is a one-piece casting of some kind of heavy lead-like alloy, so cutting and shaping requires a junior hacksaw and an engineering file. The loco comes with very clear diagrams on how everything fits together and how to take it apart, so the chassis is stripped bare, then cut in half with the hacksaw.
 A section of plastikard is glued in to extend the chassis length using araldite. The end sections are cut off and profiled so that they sit snugly inside the bodyshell.
 Whilst everything was in still in bits the bogies were stripped by very carefully unclipping the cradle with the side frame detail from the bogies, and the side frames being removed from it with a razorsaw. One of the bogies is also going to need it's driveshaft extending as it now sits further out in the frame from the motor. (The hollow plastic tube stems left over from Chupa Chups lollipops serve this purpose very well, one of the uses of having kids...)
 The
cradle holds the wheels and gears in place so it’s important not to break it or cut it too much. The new sideframes will be fitted later.
The
cradle holds the wheels and gears in place so it’s important not to break it or cut it too much. The new sideframes will be fitted later.
The body now has the correct class 23 dimensions, and the chassis has the bogies correctly poisitioned.
The next stage is to find all those little details like shutters, louvres, fans, grilles, beading, buffers etc...
 Like most modellers I rarely throw something away that might "come in useful one day", filling various old cigar and tobacco tins with endless clutter along the way.
So trawling through my various "bits" boxes turns up quite a few goodies, whitemetal bogie sideframe castings (I think from a class 20), roof panels, fan, louvres etc... The window beading is from a class 50 kit and unfortunately a little bit over-sized, but I'm willing to live with it and don't think it will be too noticeable once they are painted black and the windows are glazed.

The chassis has had the sideframes and Bachmann couplings mounted on the bogies using araldite, and is now fully re-assembled, painted, wired and tested; runs smoothly.
 With all of the brass, whitemetal and plastikard body detailling parts fixed in place, as always with araldite, it's time to think about which locomotive in what livery I want to represent before a trip to the paintshop.
Without hesitation it has to be 9509. This was the only member of the class to receive the BR Corporate Blue livery, the 9 other members of the class staying in green right up to the end.
It was also the last class 23 in service, being withdrawn on the 7th of March 1971. (So she also outlived pounds, shillings and pence by a fortnight, decimalisation day having been in mid February of 1971.)
 As the lightest colour, yellow goes first, then it's masked off with tape and two coats of Railmatch BR blue aerosol applied. Decals are from the 3mm Society Modern Image transfers sheet and a coat of matt varnish seals everything. Glazing, hand rails and a little weathering are the final tasks.
 Glazing
is a mixture of liquid PVA-based in the side windows, and individually
shaped "flush glaze" in the cab screen windows. These require a lot of
patience and good magnification as 6 little individual rounded shapes
have to be formed with a needle file out of tiddly little transparent
squares cut from strips of clear pastic salvaged from Ferrero Rocher
boxes;
Glazing
is a mixture of liquid PVA-based in the side windows, and individually
shaped "flush glaze" in the cab screen windows. These require a lot of
patience and good magnification as 6 little individual rounded shapes
have to be formed with a needle file out of tiddly little transparent
squares cut from strips of clear pastic salvaged from Ferrero Rocher
boxes;
 The two things that need to be addressed are that the bogie centre-to-centre dimension is wrong as the bogies need to be sitting further apart within the frame, and they will also need new sideframes.
The chassis frame itself is a one-piece casting of some kind of heavy lead-like alloy, so cutting and shaping requires a junior hacksaw and an engineering file. The loco comes with very clear diagrams on how everything fits together and how to take it apart, so the chassis is stripped bare, then cut in half with the hacksaw.
 A section of plastikard is glued in to extend the chassis length using araldite. The end sections are cut off and profiled so that they sit snugly inside the bodyshell.
  Whilst everything was in still in bits the bogies were stripped by very carefully unclipping the cradle with the side frame detail from the bogies, and the side frames being removed from it with a razorsaw. One of the bogies is also going to need it's driveshaft extending as it now sits further out in the frame from the motor. (The hollow plastic tube stems left over from Chupa Chups lollipops serve this purpose very well, one of the uses of having kids...)
 The
cradle holds the wheels and gears in place so it’s important not to break it or cut it too much. The new sideframes will be fitted later.
The
cradle holds the wheels and gears in place so it’s important not to break it or cut it too much. The new sideframes will be fitted later.The body now has the correct class 23 dimensions, and the chassis has the bogies correctly poisitioned.
The next stage is to find all those little details like shutters, louvres, fans, grilles, beading, buffers etc...
 Like most modellers I rarely throw something away that might "come in useful one day", filling various old cigar and tobacco tins with endless clutter along the way.
So trawling through my various "bits" boxes turns up quite a few goodies, whitemetal bogie sideframe castings (I think from a class 20), roof panels, fan, louvres etc... The window beading is from a class 50 kit and unfortunately a little bit over-sized, but I'm willing to live with it and don't think it will be too noticeable once they are painted black and the windows are glazed.

The chassis has had the sideframes and Bachmann couplings mounted on the bogies using araldite, and is now fully re-assembled, painted, wired and tested; runs smoothly.
 With all of the brass, whitemetal and plastikard body detailling parts fixed in place, as always with araldite, it's time to think about which locomotive in what livery I want to represent before a trip to the paintshop.
Without hesitation it has to be 9509. This was the only member of the class to receive the BR Corporate Blue livery, the 9 other members of the class staying in green right up to the end.
It was also the last class 23 in service, being withdrawn on the 7th of March 1971. (So she also outlived pounds, shillings and pence by a fortnight, decimalisation day having been in mid February of 1971.)

 Glazing
is a mixture of liquid PVA-based in the side windows, and individually
shaped "flush glaze" in the cab screen windows. These require a lot of
patience and good magnification as 6 little individual rounded shapes
have to be formed with a needle file out of tiddly little transparent
squares cut from strips of clear pastic salvaged from Ferrero Rocher
boxes;
Glazing
is a mixture of liquid PVA-based in the side windows, and individually
shaped "flush glaze" in the cab screen windows. These require a lot of
patience and good magnification as 6 little individual rounded shapes
have to be formed with a needle file out of tiddly little transparent
squares cut from strips of clear pastic salvaged from Ferrero Rocher
boxes;  Oops, did I just see you file too much off 'cos your concentration wandered for just a moment? Scratch the surface with the file by mistake? One just went "ping" to infinity from the tweezers when after hours of concentration you were just about to trial-fit it? Start again! :-)

Overall it's not a bad depiction of a Baby Deltic I feel. (Possibly unique in 3mm scale?) Yes I have had to make a few compromises in some of the detail, but there's far less wrong than if I had built the 40 as was.
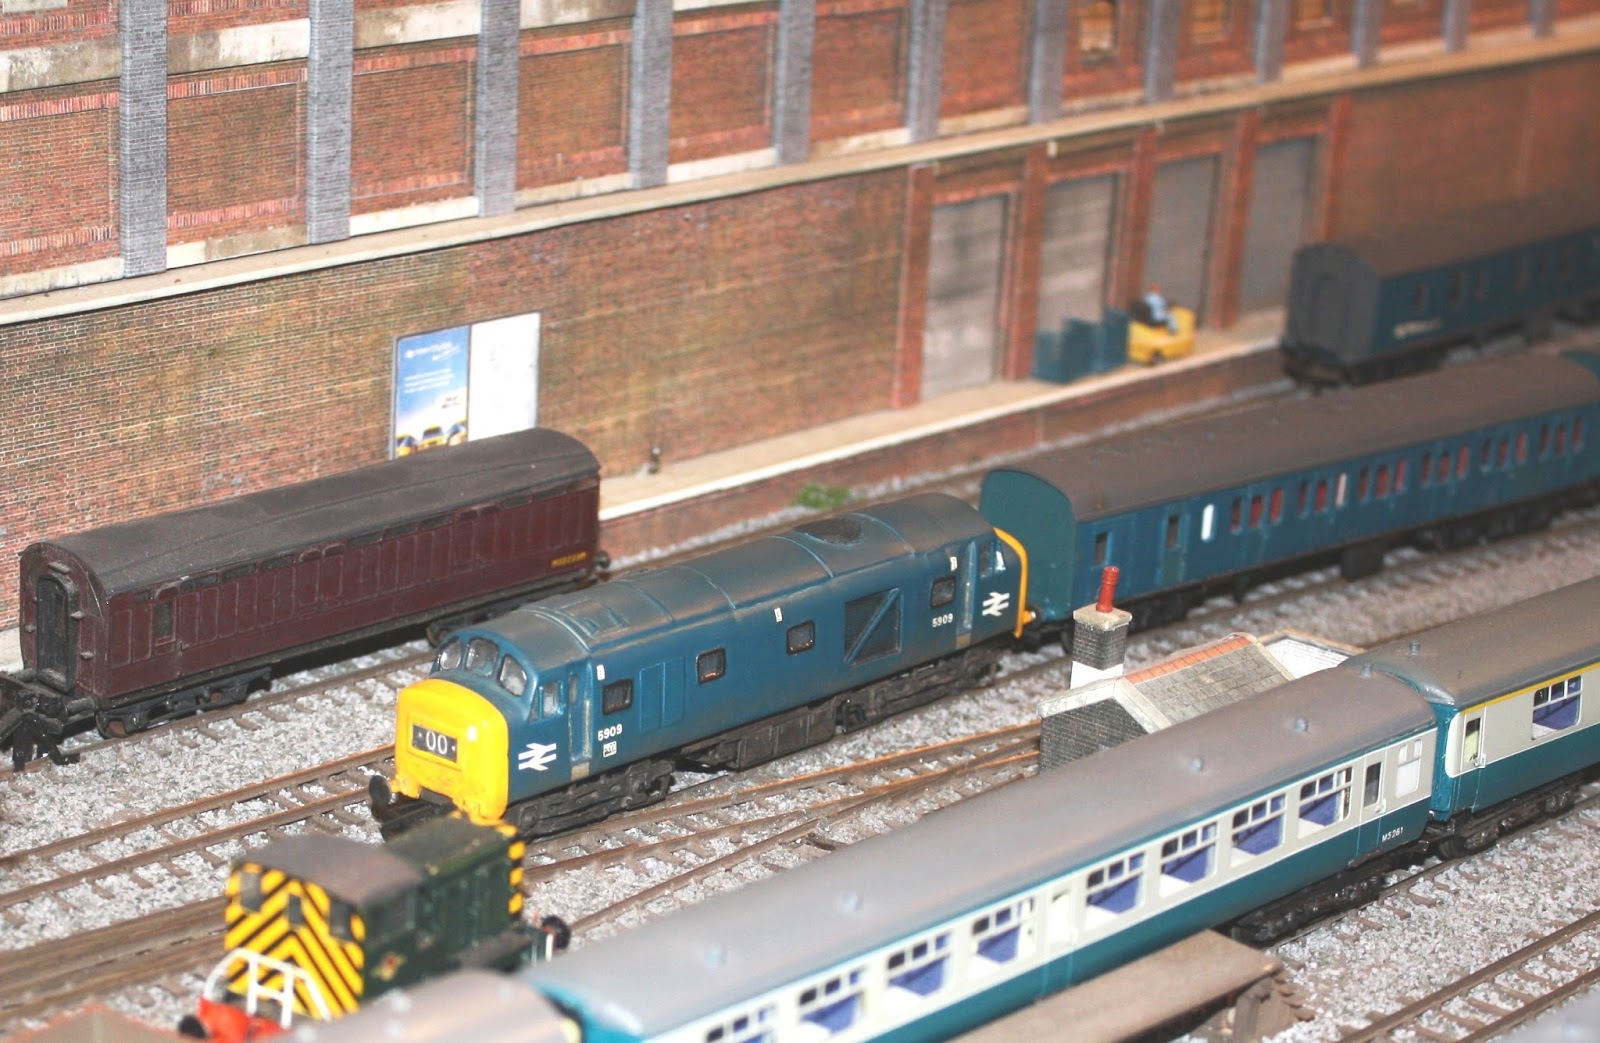
Her first operational running was on Jim Barry's "Norton Foldate & Aldgate Hill" and even though the PIKO chassis has been considerably chopped about, it still runs just as smoothly as when first out of the box. Very good slow running, sure-footed over pointwork and steady output from a motor with two flywheels.
And just to prove that certain modelling techniques are equally applicable in scale 12" to 1ft even when using heavier materials and tools, take a look at this project:
http://www.thebabydelticproject.co.uk/